

In celebration of the 4th of July and the Summer Season, I have some cute cupcake liners and toppers to share courtesy of My Memories Suite. You could use these cute cupcake liners for the 4th of July, Summer BBQs, Birthdays, Weddings, Showers, just use your imagination.
Independence Day decorated cupcakes
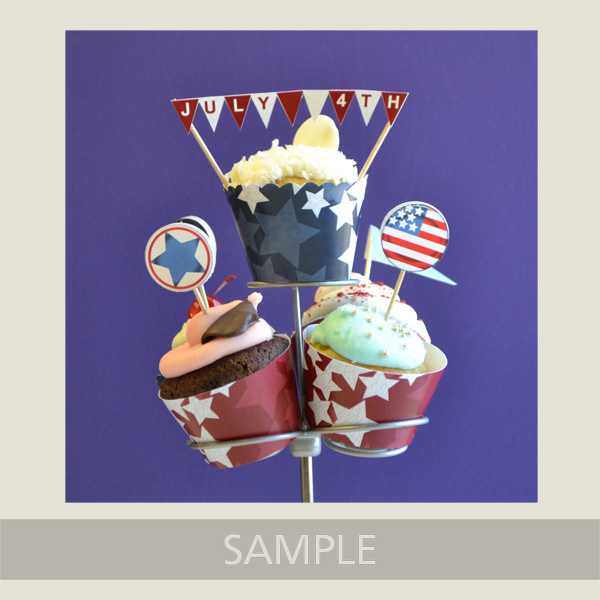
http://www.mymemories.com/store/share_the_memories_kit_1
Picnic Themed Decorated Cupcakes

http://www.mymemories.com/store/share_the_memories_kit_2
Black and White Themed Decorated Cupcakes

http://www.mymemories.com/store/share_the_memories_kit_3
Using MyMemories Software to Customize your Cupcake Liners
Download template file and install it into your software
Using MyMemories Suite, choose Create Album From Designer Template and find your project
Now you can print and enjoy the provided template, or customize it with your own papers and embellishments.
TIP:
You can right-click on the white guide and lock it in place to keep it from moving while you are working. Make sure this is the top layer of your project before printing.
Instead of adding the paper as a background paper, you can add it as an embellishment so that you can move the paper around. This is especially useful when using papers with stripes or circles, so you can decide which part of the paper you want to use.
Once it is added as an embellishment, you can now select the paper and move it into the position you want it.
Just SAVE and PRINT on cardstock!
Cupcake Liner Tutorial
1. Purchase or Bake and Cool Cupcakes. If cupcakes are frosted, place in refrigerator and chill cupcakes before putting liners on. It is easier to put liners on if the frosting is cold.
2. Print your Cupcake liner templates on cardstock and gather supplies. Each printed page will have enough supplies for 2 cupakes. (Recommended supplies: small craft scissors, tape, foam squares, 1.25″ circle punch, toothpicks and ribbon)
3. Using the scissors cut along outside line.
TIP: Use a 1.25″ circle punch to cut out the toppers. If printed at full size, the circles should be exactly the same size.
4. Wrap liner around cupcake and tape at seam.
TIP: If using a smaller cupcake, just wrap around at the desired height. You can place a smaller cupcake at the bottom of the liner or make it tighter and wrap it around at the top.
5. Using foam squares or tape, attach the front and back circles together to form the topper. Insert toothpick between the circles.
6. Add ribbon onto the toothpick or at the bottom of the front circle, if desired.
7. Insert toothpick into cupcake. Enjoy the finished cupcakes and share. Don’t forget to use your imagination. The possibilites are endless!
If you’re really interested in digital scrapbooking, be sure to check out My Memories Suite v3 . It can be purchased online and retails for $39.97. If you use coupon code STMMMS45174 you will receive $10 when checking out.
Some posts on this site contain an affiliate link. Affiliate links are used in an attempt to offset the operational costs incurred by running this website. Clicking on an affiliate link does not increase the cost of the product if you buy it. It does mean that I MAY make a commission if you purchase the item. As an Amazon Associate I earn from qualifying purchases.

Cupcakes–decorated–yez!